Table of Contents
USB-IR-Boy
At a specific day it stood out for me, that I would like to have the ability to control my mediaplayer (For me this is Amarok under Linux) with the IR remote from my NAD amplifier.
So I found the original of this project and decided that I have to build one for my self.
It's a Sourceforge project, so I tried to send my stuff to the original developer without success. That's the reason why I write this page here and why it is in english.
Description
This project describes an infrared (IR) receiver for IR remote controls commonly used by consumer electronic devices like TV's, amplifiers, DVD players,… Most of them use the same coding scheme called RC-5, so you can use every of your spare remotes or also only some spare buttons on your remote together with this receiver.
As the name suggests this receiver is connected to the USB port of your computer.
This receiver can be used with the well known Linux software LIRC. There is a description of my LIRC/Amarok setup below.
Download
I used this oportunity to give Kicad a try. Kicad is a open source ECAD software with a similar interface than Eagle.
All Kicad files, schematic,pcb, libraries are in the zip file that I attached.
The etching foil, the assembly plan and the bill of material (BOM) are also in the archive:
usb-ir-boy-brain4free.zip
As a backup and for your convinience the MCU firmware and the programmer tool:
usbirboy-0.3.1.tar.gz spgmr08-0.12.tar.gz
Hardware
I made small changes to the original design. Mainly I'm using a different IR receiver which runs with a 3.3 V supply voltage. So I don't need the voltage divider any more (resistor R1 in the original design) and due to the MCU internal 3.3 V regulator I'm sure that I have a clean supply voltage for it.
I wrote a bill of material file (BOM) with Farnell part numbers for easy ordering.
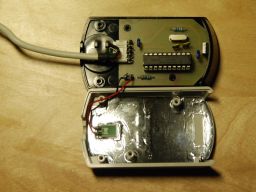
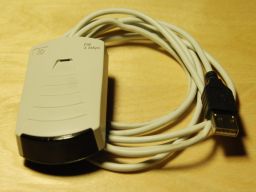
I made a simple pcb that fits into a former HP IRDA receiver box for HP laser printers (HP C4103A). Check the fotos:
Building
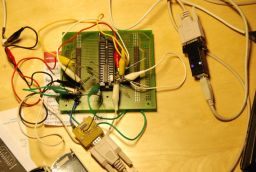
I use the unmodified firmware from the original project and used there documentation to download the firmware to the MCU. For this you have to build a simple prommer. You need this one only once, so don't loose time with soldering or even etching, use stuff that's around to build it.
To programm the MCU I used a FTDI chip based USB → serial converter on my laptop and it worked. There is no real problem when you don't have a serial port anymore on your computer.
LIRC setup
I had some problems with irrecord. It recognised the remote control in raw mode
and not as something more standard. The produced *.conf file was not
working.
Using a *.conf file for a similar remote control provided by the lirc package is working fine for me. It seems that this is a known problem in the latest firmware version, on the mailinglist Norbert Hohenbichler has reported this error.
To use Amarok with your freshly build USB-IR-Boy and your running LIRC daemon I used this description. In short, make shure lircd and irexec is running, configure your .lirc configuration in a way that for a key press irexec is executed and sends a DCOP message to Amarok to do what you want. In this way you can use your remote control for every DCOP capable software!
One example section of my .lirc file:
begin
 prog = irexec
 remote = nad450
 button = TapeA-Play
 repeat = 2
 config = dcop amarok player volumeUp
end


Discussion